Knowledge Base Detail

Category Name > MacOsX
DFU mode M1

DFU M1 MacBook Air or Pro – Tim’s method

Another way from Tim Perfitt:

  1. Turn on the Mac (or leave it on)

  2. Once it starts booting, hold the power/keyboard combo (right shift, left control, left option) until it shuts off

  3. Count to 3

  4. Release all but the power button for 7 seconds (or until it shows up in AC2)

DFU M1 MacBook Air or Pro – my method

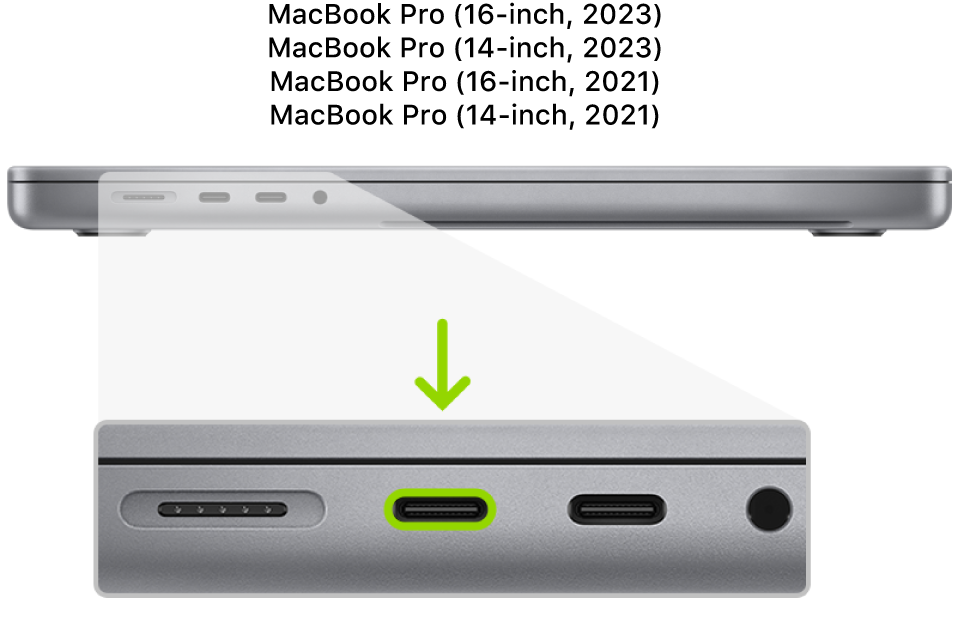
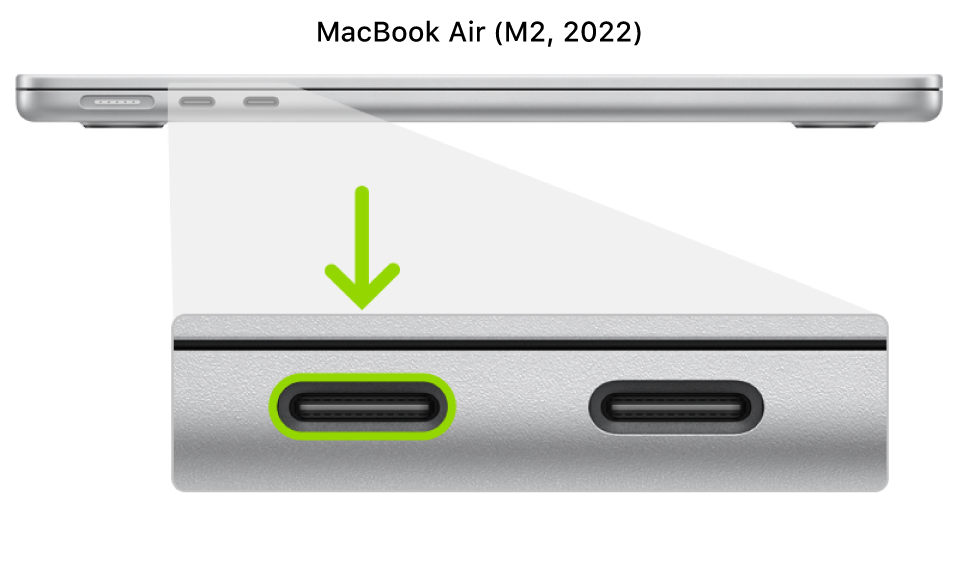
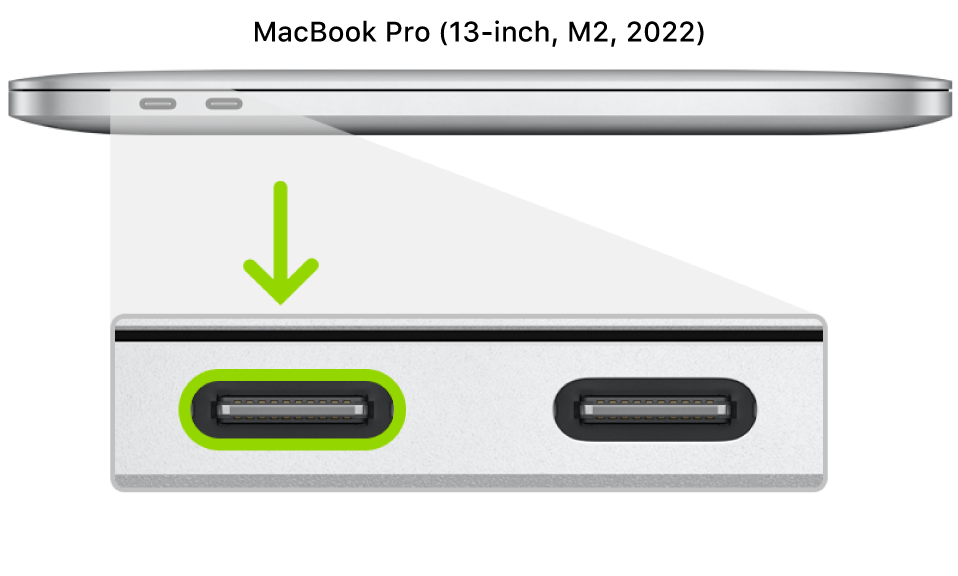
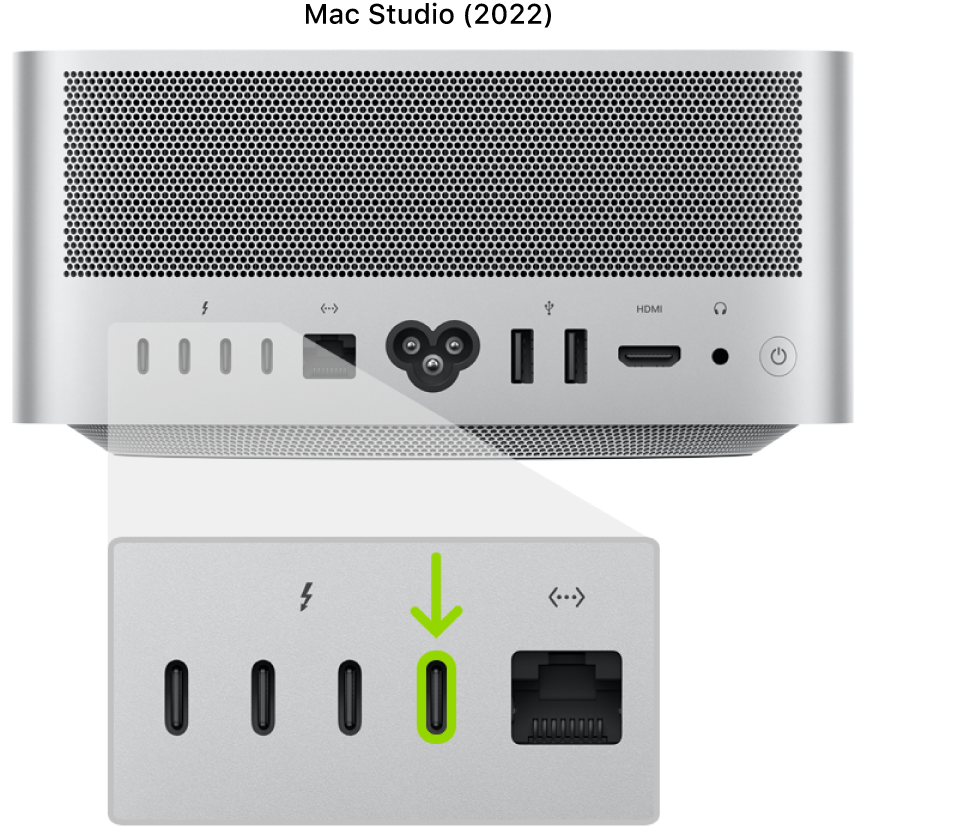
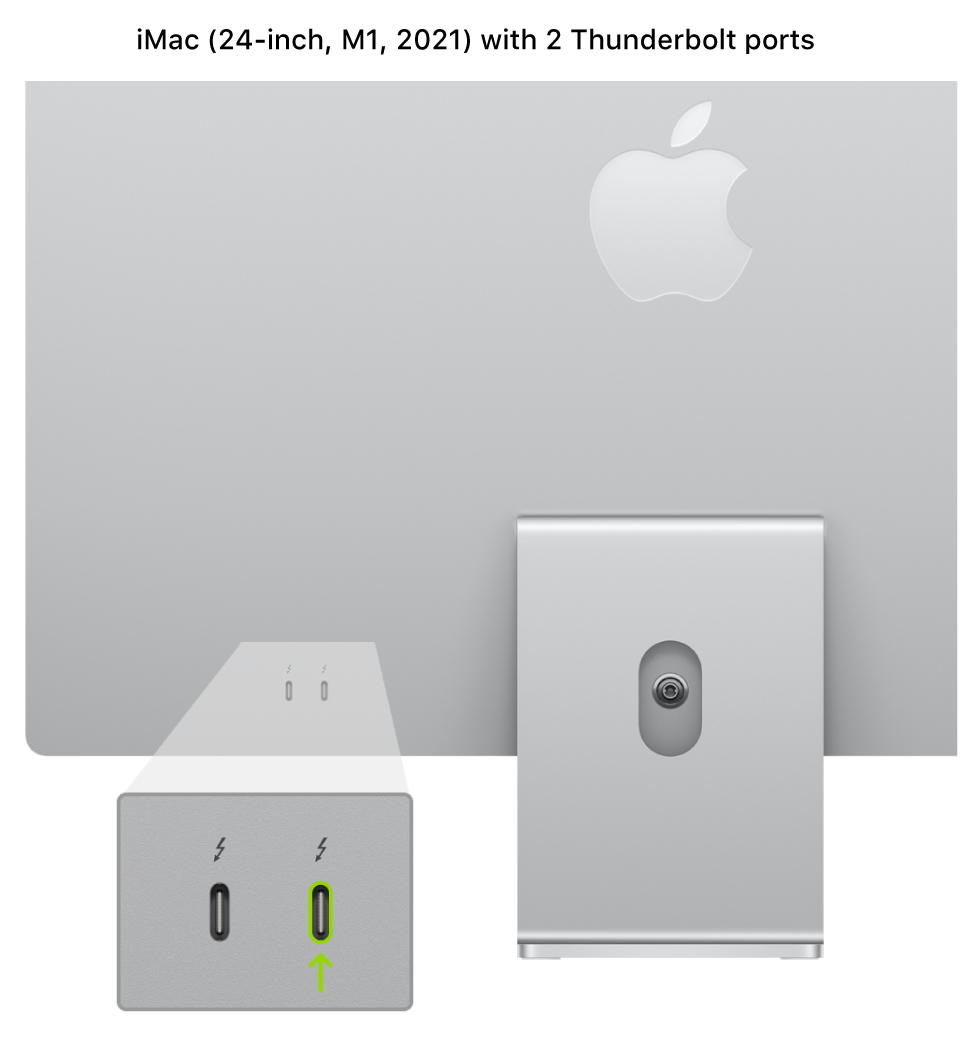
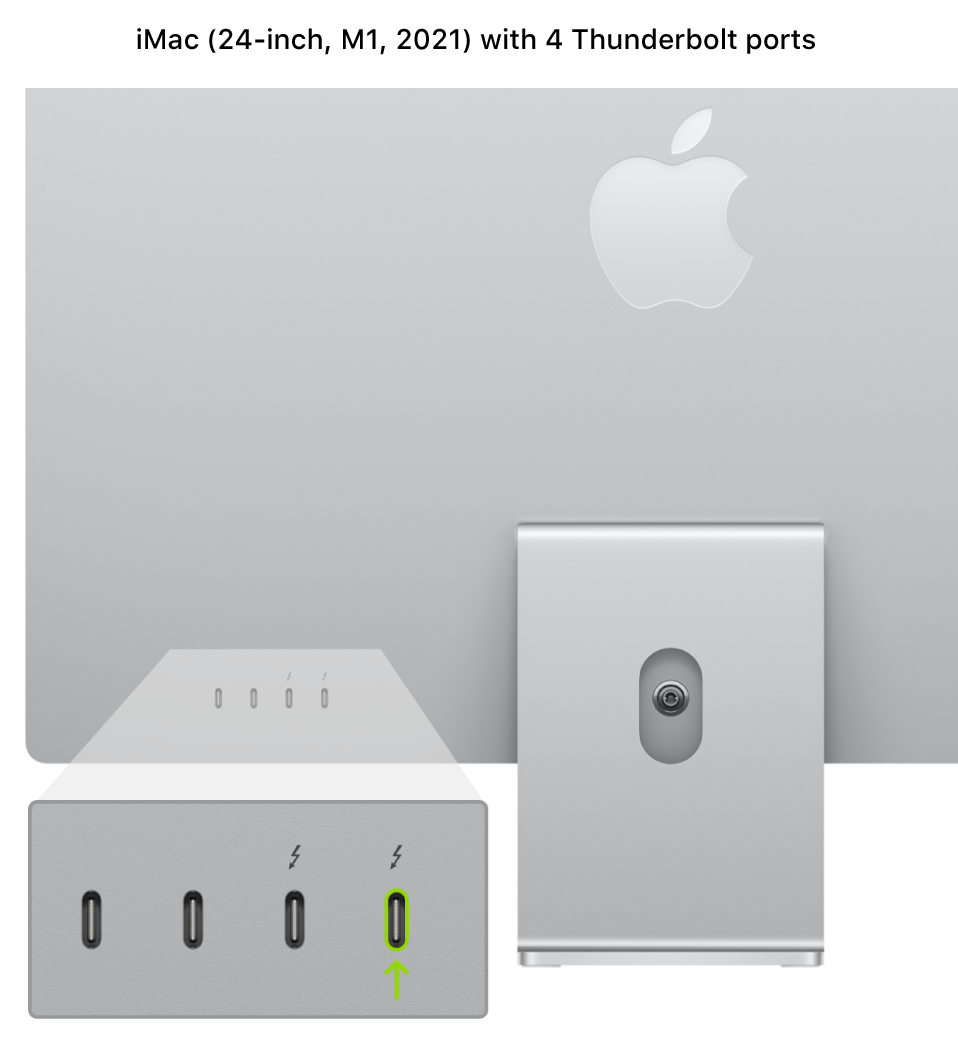
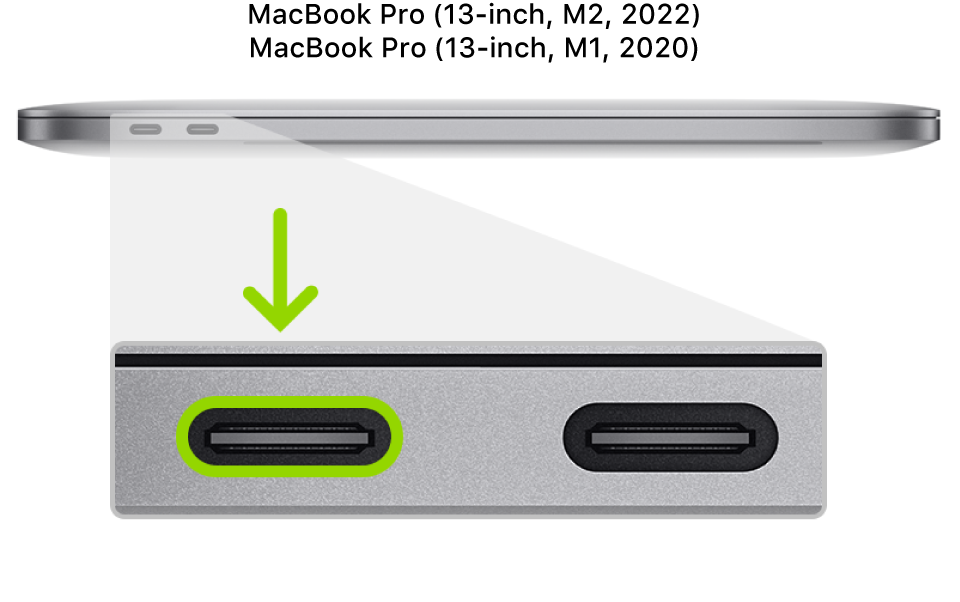
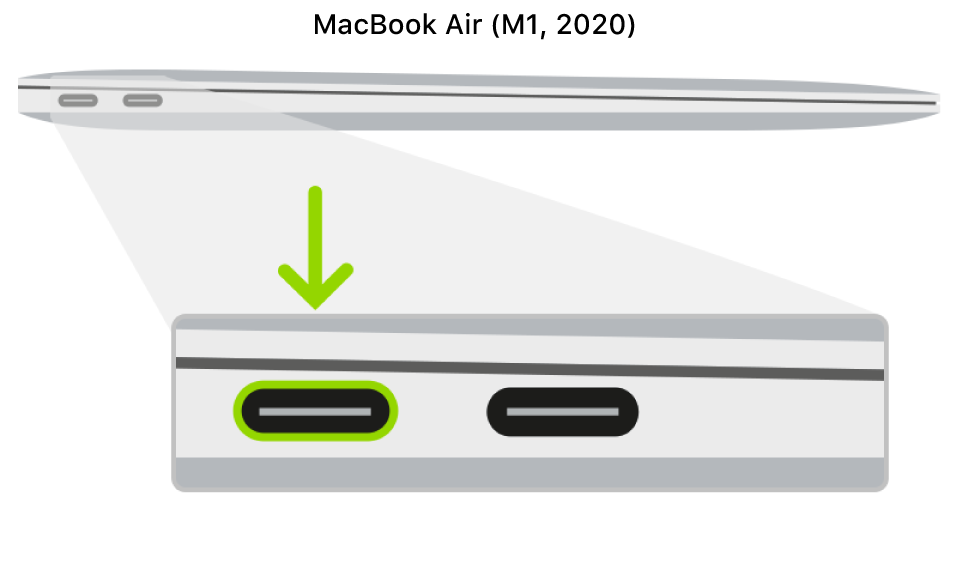
  1. Plug M1 Mac to host Mac using a DFU cable(USB-C to USB-C).   Make sure you use the correct port.

  2. Shut down M1 Mac

  3. Press together:

    1. right SHIFT

    2. left CONTROL

    3. left OPTION

  4. While you hold the 3 keys, press and hold the power button

  5. Release the 3 keys after counting 10 seconds out loud. You’ll see an Apple logo while you count, just ignore it.

  6. Keep power button pressed for 10 additional seconds.

  7. Display stays black, it’s normal.

Now you can use Apple Configurator 2 to restore it! Make sure you use the latest version on the latest macOS.

DFU Mac mini

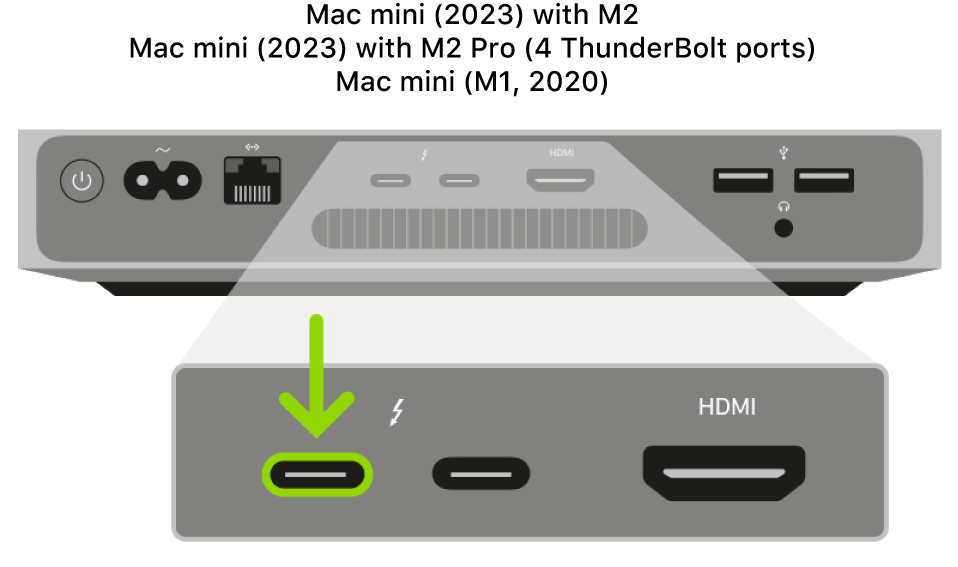
Mac mini are extremely easy. All you need to do is to unplug from power, wait 10 seconds, hold power button, plug power, wait a few seconds for the LED to be amber. See documentation.


Step 1: Connect the Mac computers

  1. Make sure your first Mac with Apple Configurator installed is plugged into a power source and started.
  2. Shut down the second Mac.
  3. Plug in the USB-C cable (along with any adapters needed) and connect the two Mac computers.
    The left side of a MacBook Pro 14-inch or 16-inch with Apple silicon, showing two Thunderbolt 4 (USB-C) ports toward the back, with the leftmost one highlighted.
    The back of a Mac mini with Apple silicon, showing an expanded view of the two Thunderbolt 3 or 4 (USB-C) ports, with the leftmost one highlighted.
    The left side of the MacBook Air (M2, 2022), showing two Thunderbolt 3 (USB-C) ports toward the back, with the leftmost one highlighted.
    The left side of a MacBook Pro 13-inch with Apple silicon, showing two Thunderbolt 4 (USB-C) ports toward the back, with the leftmost one highlighted.
    The back of the Mac Studio (2022), showing four Thunderbolt 4 (USB-C) ports toward the back, with the rightmost one highlighted.
    The back of the iMac (24-inch, M1, 2021), showing two Thunderbolt 3 (USB-C) ports toward the back, with the rightmost one highlighted.
    The back of the iMac (24-inch, M1, 2021), showing four Thunderbolt 3 (USB-C) ports toward the back, with the rightmost one highlighted.
    The left side of a MacBook Pro with Apple silicon, showing two Thunderbolt 3 (USB-C) ports toward the back, with the leftmost one highlighted.
    The left side of a MacBook Air with Apple silicon, showing two Thunderbolt 3 (USB-C) ports toward the back, with the leftmost one highlighted.
  4. Launch Apple Configurator .
Article Attachment